Real Parties: Frozen 3rd Birthday

Happy Memorial Day weekend!! I’ve finally gotten around to editing the photos from my sweet girl’s 3rd birthday. I feel like it’s taken me forever, so I’m super grateful for the extra day this week to get some projects out of the way! I hope you’ve all been able to do the same.

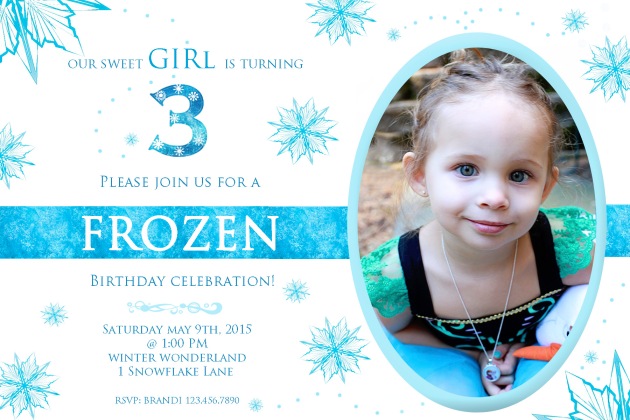
As many of you know,my daughter’s birthday theme was Frozen. We transformed our home into a winter wonderland on what turned out to be the hottest day we’ve had this year. 74+ degree weather + family and a bouncy castle for the birthday babe, with some extra special details designed by yours truly.

This year’s birthday was quaint, but absolutely perfect. I personally live for celebrations like these. As the host, there’s nothing greater than being able to sit and relax and enjoy guest’s company after all the hard work and preparation. Our baby girl couldn’t have had a better day.

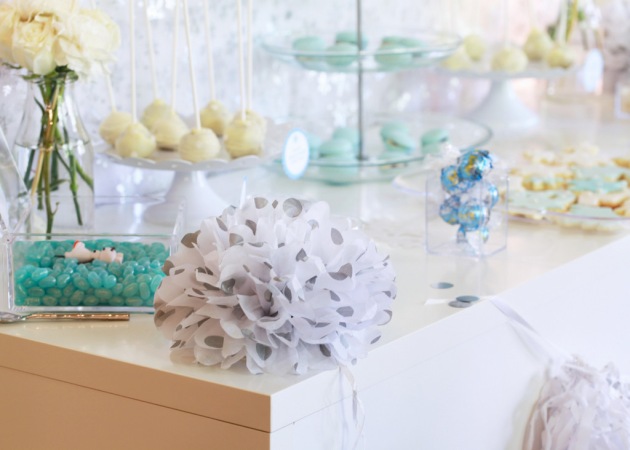
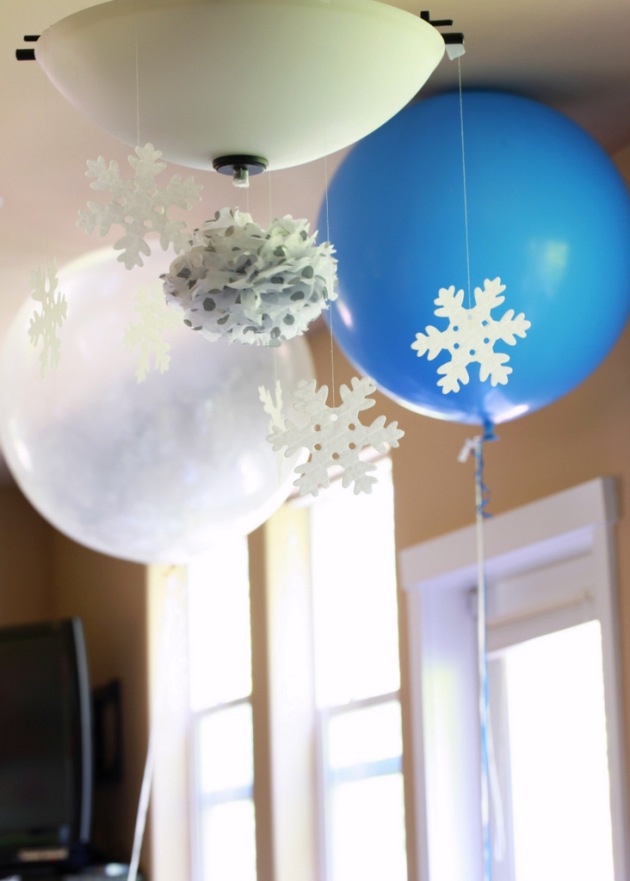
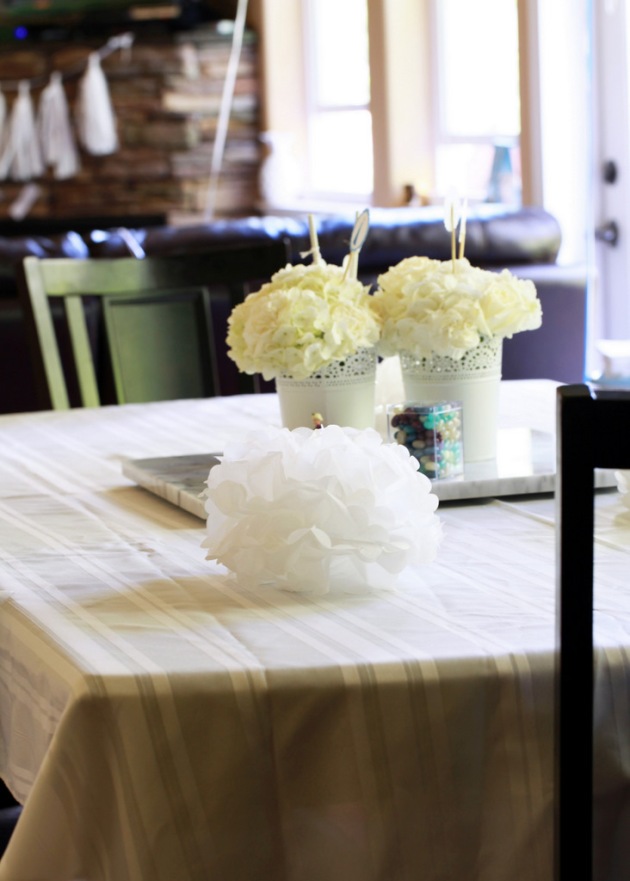
We chose a color scheme of white and blue with silver accents to capture all things Frozen. I designed the dessert table in all white with a shimmer snowflake backdrop and hanging lights. On the ceiling above the dessert table were an array of snowflakes and tissue poms hung to mimic the clouds and snow. I used all white and crystal clear containers and and stands to arrange the sweets tying in some Frozen character figures that I found at Marshalls and my daughter’s Elsa barbie for a finishing touch.

Frozen 3rd Birthday | Posh Little Designs

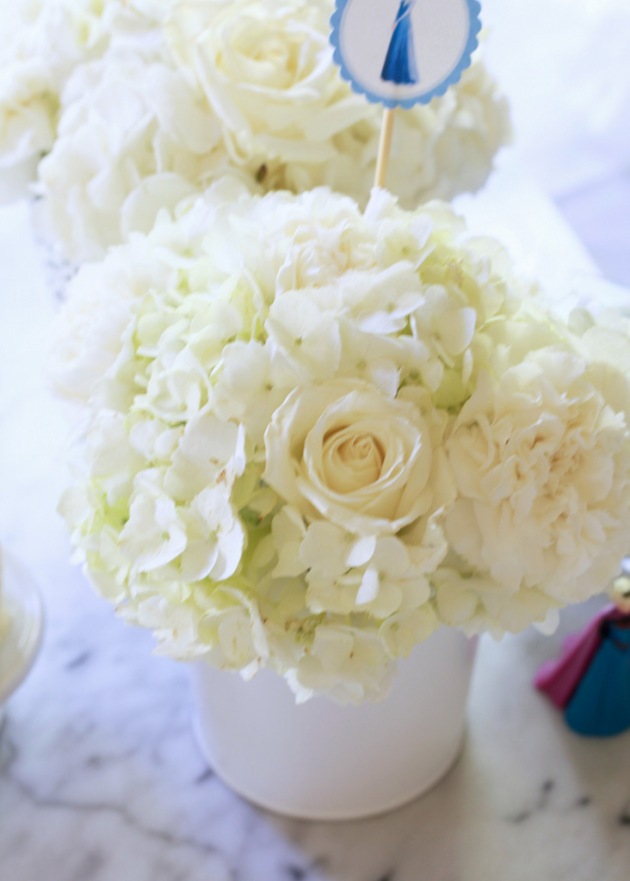
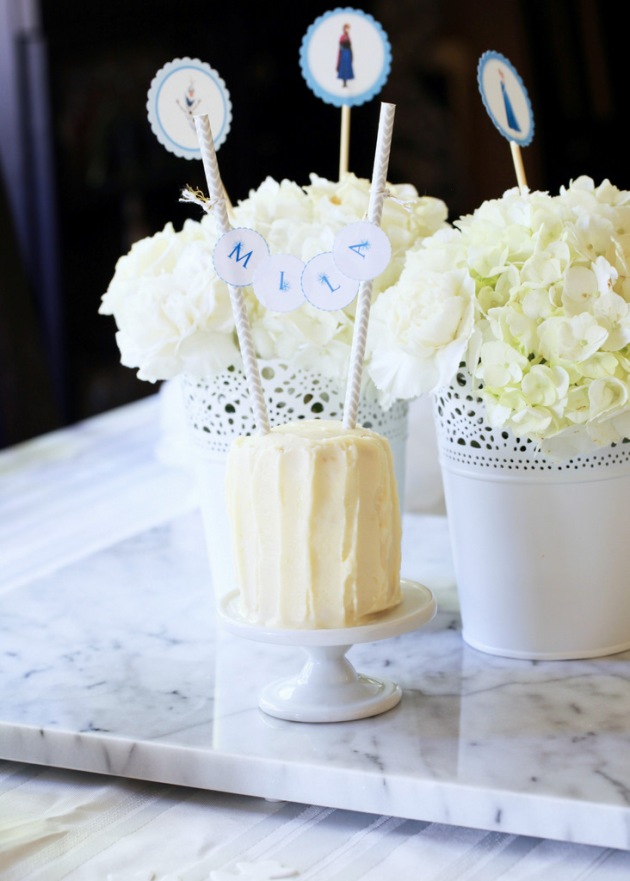
Our decorations consisted of white tissue poms, hand created tassel garland in all white, jumbo balloons and an olaf balloon. We also blew up a variety of small balloons to mimic snowballs and placed all around our home and surrounding our dessert stations. For the flowers, I went with an all white color scheme, choosing billowy hydrangea, roses and carnations to arrange. Each arrangement was finished with a Frozen character paper design, that I simply made in photoshop. Subtle and not over the tops in terms of character designs, which is one of my signatures.

Frozen 3rd Birthday | Posh Little Designs

Frozen 3rd Birthday | Posh Little Designs

Frozen 3rd Birthday | Posh Little Designs

Frozen 3rd Birthday | Posh Little Designs

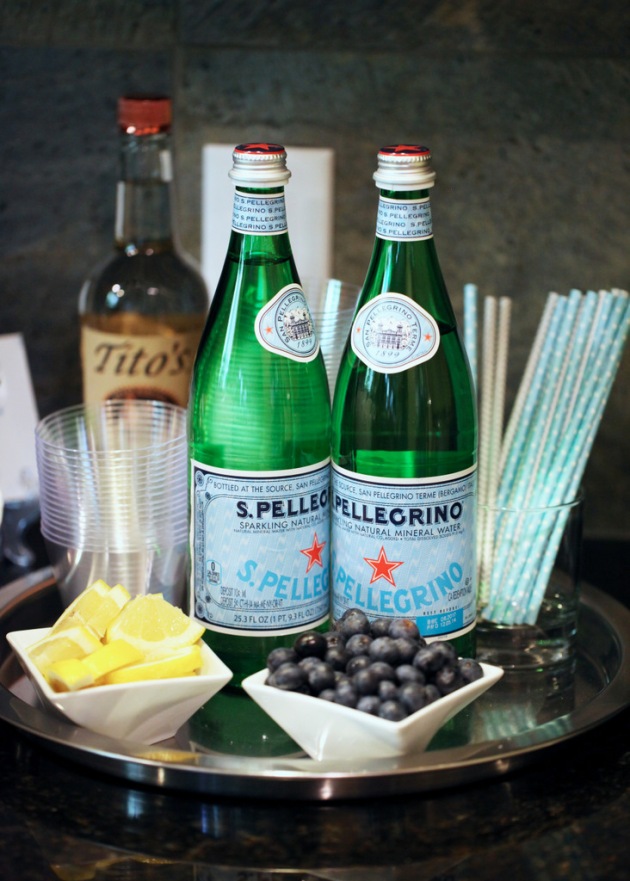
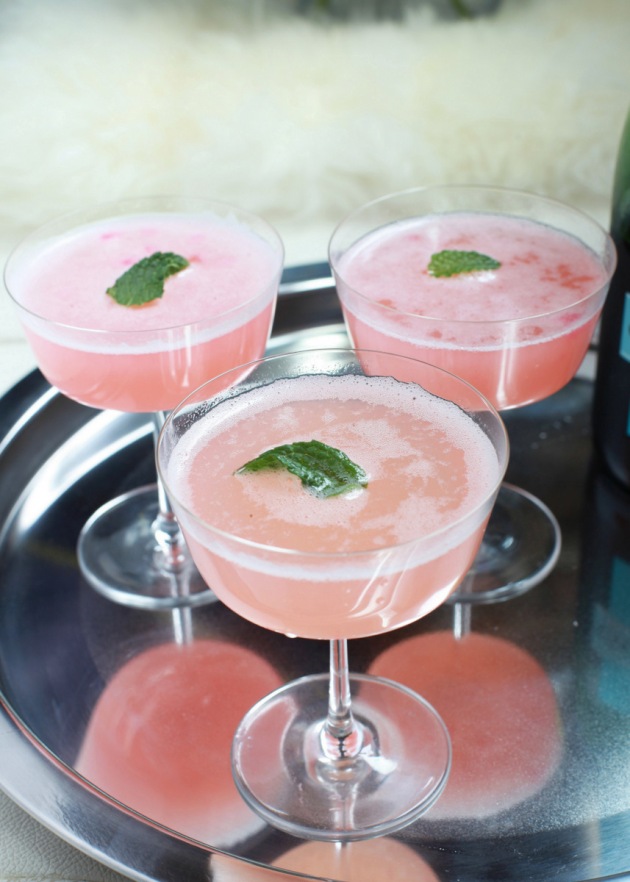
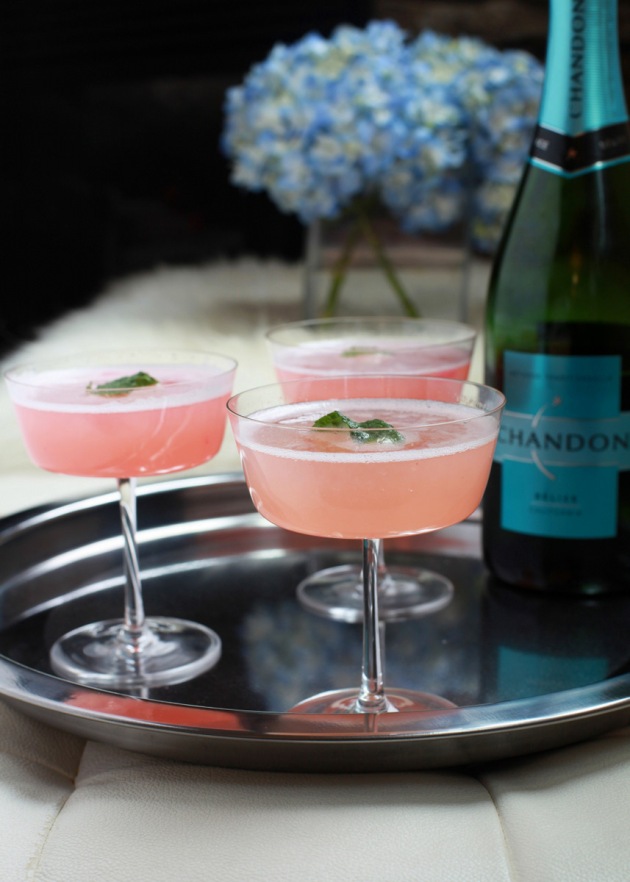
On the menu. We offered a variety of beverages, from organic juices and San Pellegrino to a homemade Vanilla bean and Blueberry infused Lemonade, with lemons and blueberries for garnish.

Frozen 3rd Birthday | Posh Little Designs

Frozen 3rd Birthday | Posh Little Designs

For lunch we served all of my daughter’s favorite foods. Chicken sausage and homemade turkey burger sliders, grilled zucchini, fresh salads, crudite and fruit, hummus, olives, gluten free and dairy free crackers and chips.

After lunch we sang happy birthday to our little babe! She had so much fun trying to blow out the candles on her mini cake made by me and my hubs.

Frozen 3rd Birthday | Posh Little Designs

Frozen 3rd Birthday | Posh Little Designs

Looking back, we may have went a bit overboard on the dessert options, but as they say, one can never have too many.

Frozen 3rd Birthday | Posh Little Designs

Everyone always looks forward to my homemade lemon sugar cookies with royal icing. I made them with soft blue and white icing and glitter/snowflake embellishments (coming soon to the shop). I’m certainly not an expert in terms of cookie designs, but I thoroughly enjoy making and decorating them, which is one of the reasons I carry the cutters in my shop! All of the cutter designs I used to create the cookies seen here, are available now!

Frozen 3rd Birthday | Posh Little Designs

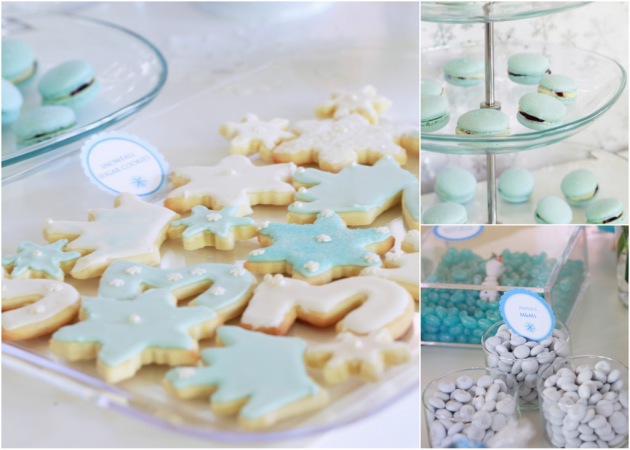
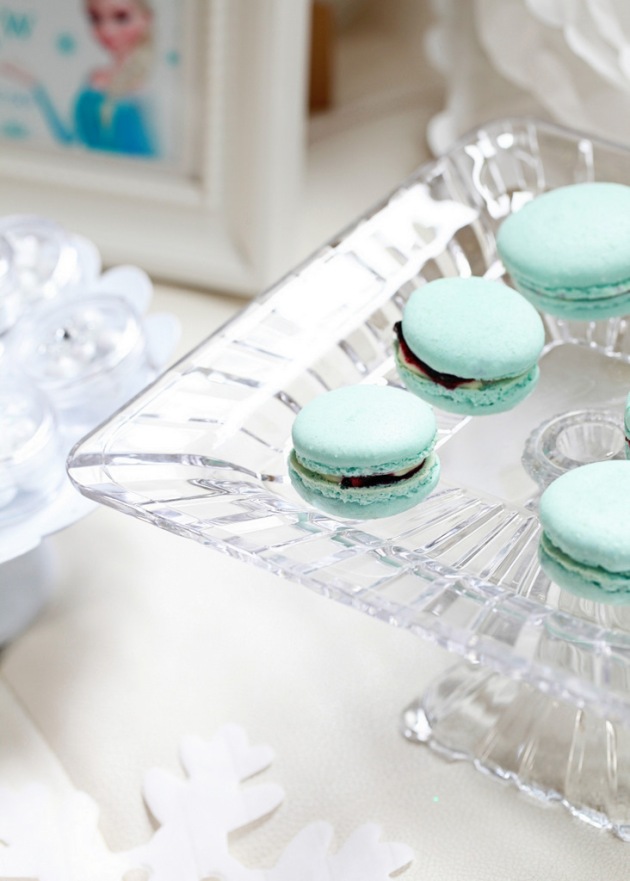
In addition to the cookies, I made lemon and berry cake pops, dipped in white chocolate, and homemade french macarons filled with white chocolate and a fresh blueberry preserves. This time I tried out Annie’s Eats recipe for macaron shells, which I highly recommend. I loved how they turned out! My most successful batch to date!

Frozen 3rd Birthday | Posh Little Designs

Candy Sweets:

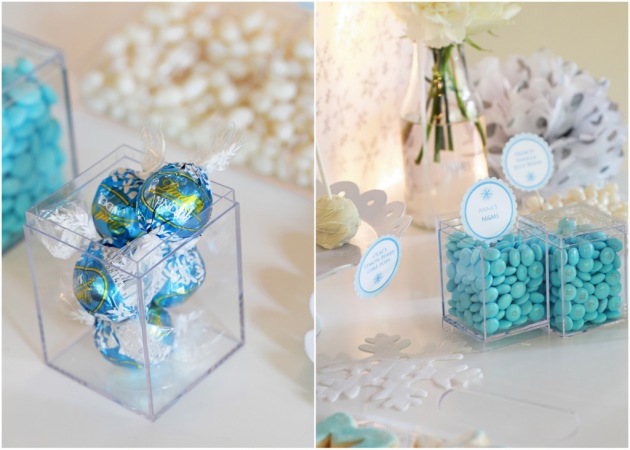
White and soft blue M&Ms

Vanilla Bean and Berry Blue Jeweled Jelly Bellies

Crystal clear rock candy – aka Elsa’s Icicles

And Lindt White Chocolate Truffles.

Frozen 3rd Birthday | Posh Little Designs

Frozen 3rd Birthday | Posh Little Designs

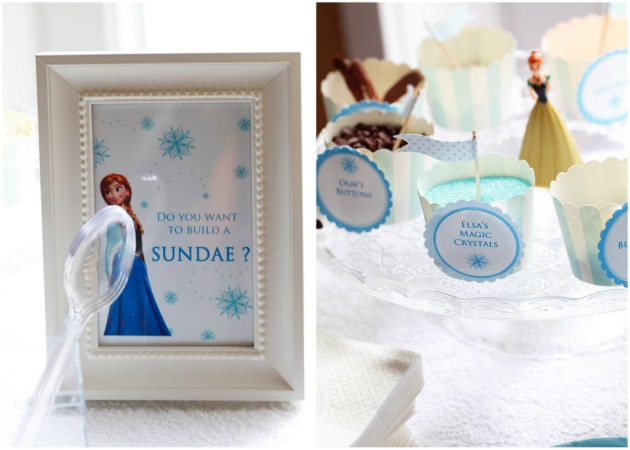
One of the many highlights from the party was the sundae station, complete with a sign of Anna asking: Do you want to build a Sundae? This was a little play on the popular song all of us Mommy’s know much better than we’ve ever wanted to, but super worth it to see the look on the kid’s faces. The littles filled their ice-cream cups to the brim with every frozen topping they could point out, including melted chocolate. I’ll be sharing more details on the Frozen sundae bar in an upcoming post, so if you’re planning a frozen themed party in the near future, you’ll be able to make one too!

Frozen 3rd Birthday | Posh Little Designs

Frozen 3rd Birthday | Posh Little Designs

Frozen 3rd Birthday | Posh Little Designs

After gifts, we played pin the nose on Olaf and as guests left, we handed out mini crystal containers filled with white sixlets or “snow” rather.

Frozen 3rd Birthday | Posh Little Designs

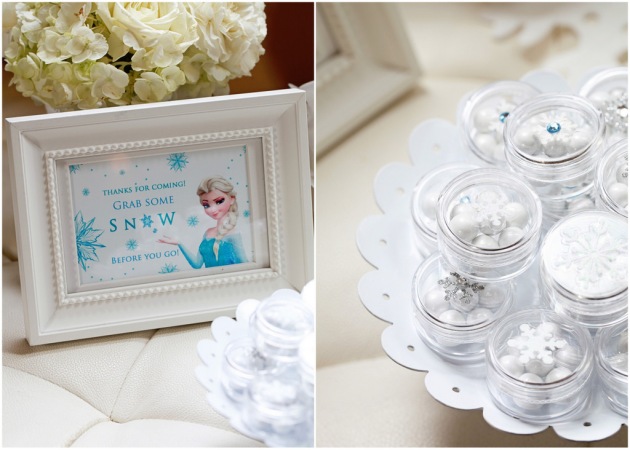
Each favor container was adorned with a glittered snowflake for a perfectly frozen and posh finishing touch!

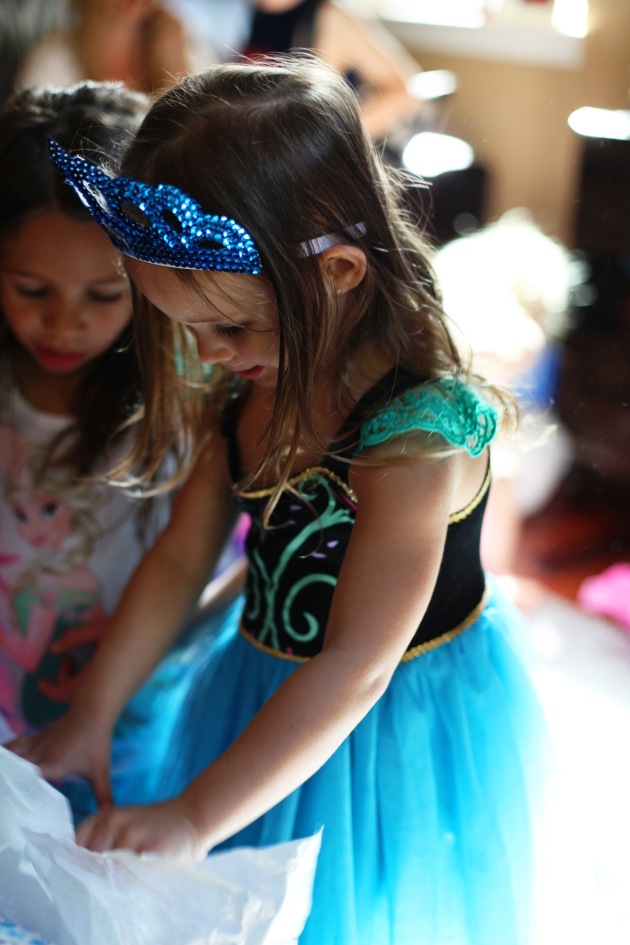
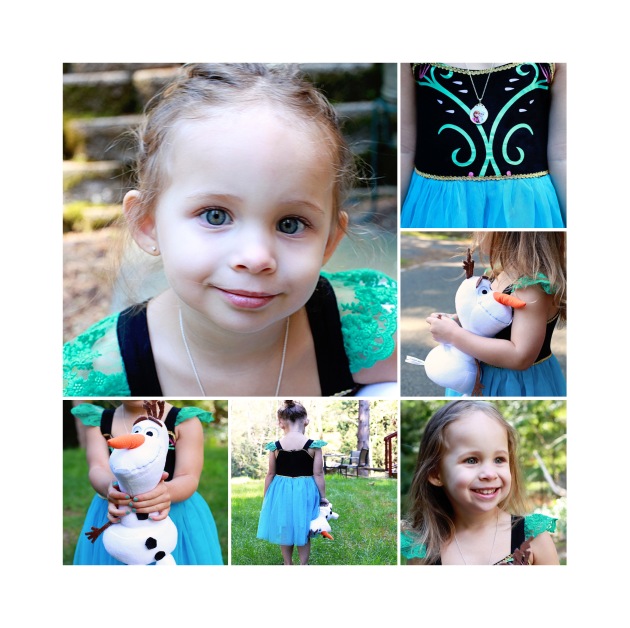
This last picture makes my heart completely melt! I can’t get over these adorable smiles and I love how much fun they had celebrating. Seeing the happiness on their faces is what life’s all about!

Frozen 3rd Birthday | Posh Little Designs

Thanks for reading! I’ll have much more on the way soon!

xo

Party Links

Anna inspired dress – Angora Boutique

Blue and White Candy – Nuts.com

French Macaron Recipe – Annie’s eats

Cookie Cutters – Posh Little Designs

Paper Straws – Posh Little Designs

This specific Frozen themed birthday party design is hand created and specific to Posh Little Designs, seen first on Posh Little Designs. All Rights Reserved. 2011-2015.

All Images are photographed and owned property of Posh Little Designs. All Rights Reserved 2015.

Outfit of the day

It’s not often that I share images of my looks or what I wore for the day, but with my sis in town from LA and the beautiful weather we had over Mother’s Day weekend, snapping a few photos after brunch was a must.

It’s pretty rare for us to have such warm temps so early in the PNW, so I took full advantage, wearing a look fitting for our sun filled day down at the harbor.

OOTD | Posh Little Designs

I was feeling a bit nautical in a navy sweater and white floral tunic dress, that I paired with an espadrille wedge and oversized sunnies for a 70s vibe.

This look literally took just moments to put together, with casual and chic elements perfect for my Mother’s Day celebration.

here’s what I wore-

sunnies: dior tunic dress: h&m espadrilles: burberry handbag: burberry

Have a lovely Sunday!

xo

photo by my dear sis @janiyawalker

All Images are photographed and owned property of Posh Little Designs. All Rights Reserved 2015.

Frozen Party – Sneak Peek

Happy Friday!! Hope you all had a lovely week and fabulous Mother’s Day as well! My dear sis has been in town from LA so we spent last weekend catching up and also celebrating my baby girl’s frozen themed birthday! I have yet to edit the final photos, but wanted to share with you a few of the party deets in a series that I captured via instagram.

Frozen Birthday Instagram | @poshlittledesigns

Her party included many signature designs and handmade details. From the homemade french macarons filled with white chocolate and a fresh blueberry jam, to the all white dessert table with icy blue accents. The sweet mini cake for our birthday babe and the white and silver tissue pom and snowflake decor, it was quite possibly the coolest frozen party around!

Can’t wait to post the final reveal here soon, but in the mean time, you can find me insta.

Have a fab weekend!

xo

All Images are photographed and owned property of Posh Little Designs. All Rights Reserved 2015.

Chocolate Chili Mini Churros

Switching gears from all things Frozen, to celebrate something much more adult and exciting, Cinco de Mayo. Because I’m not one to ever pass up a homemade margarita or some yummy Mexican eats and after being surrounded by Elsa, Anna and Olaf for the last few weeks, the holiday definitely represents a much-needed break for me. And for added excitement, I’ve cooked up a batch of homemade mini churros dipped in chili spiced chocolate because well, Cinco de Mayo!

I found the recipe for the churros on the Food Network and made the batter dairy-free by using coconut oil instead of butter. And to make them ever lighter, they’re baked and not fried! The chocolate for dipping is also free of dairy with a touch of heat for an added kick.

Totally fitting for a fiesta!

Chocolate Chili Mini Churros | Posh Little Designs

Chocolate Chili Dipped Mini Churros

Homemade mini churros, dipped in a spiced vegan dark chocolate for a sweet, spicy and lightened up twist on the old classic.

Ingredients/Supplies

 Churros

1 cup water

1/2 cup coconut oil or vegan butter

1 cup flour

1/4 tsp salt

3 eggs beaten

Cinnamon Sugar Mixture

1/2 cup sugar

1 tablespoon cinnamon

Additional Items

1 large baking sheet lined with tinfoil and lightly sprayed

Piping bag or large ziplock fitted with a medium-sized star tipped pastry tube

parchment paper

Dipping Chocolate

1 bar of quality vegan dark chocolate

1/8 teaspoon chili powder

Instructions

Pre-heat oven to 400

Combine water, coconut oil/butter and salt in a pot and bring to a boil.

Whisk in flour, stirring quickly until mixture turns into a ball.

Remove from heat and make a well in the center of the ball of dough.

Slowly stir in the eggs a little at a time, mixing continuously to make sure the eggs don’t scramble.

Continue mixing in eggs until they’re completely incorporated into the batter.

Allow batter to cool slightly, then transfer to your piping bag.

Pipe 3 inch long churros into rows on your greased baking sheet.

Bake in the oven for 10 minutes at 400 degrees and then broil on high for 1-2 minutes until your churros are golden brown.

Meanwhile, mix together cinnamon and sugar in a small dish.

Once churros have been removed from the oven, roll them into the cinnamon and sugar mix until fully coated.

Set aside.

Chocolate Chili Mini Churros | Posh Little Designs

Heat your dark chocolate in a microwave safe dish on 30 second intervals, or in a double boiler until completely melted.

Stir in 1/8 teaspoon of chili powder.

Dip the tips of your churros into the chili spiced dark chocolate and place back on the parchment paper to cool.

Sprinkle a light dusting of the chili powder on top of the chocolate dipped churros for garnish.

Chocolate Chili Mini Churros | Posh Little Designs

Enjoy!

Chocolate Chili Mini Churros | Posh Little Designs

How do you plan to celebrate Cinco de Mayo? I hope you give this fiesta fitting recipe a try!

Much more on the way soon!

xo

Churro Recipe adapted from The Food Network

This specific recipe for these Chocolate Chili Mini Churros was seen first on Posh Little Designs. All Rights Reserved. 2011-2015.

All Images are photographed and owned property of Posh Little Designs. All Rights Reserved 2015.

Coconut Milk Chia Pudding (V)

Happy Friday! I know things have been a little quiet here lately but I’ve been busily working behind the scenes to prepare for my sweet girl’s birthday happening next Saturday. Much more to share on all of that soon, but as for now, I’m thrilled the weekend is here!

And to start my day….my go-to Chia Coconut pudding that takes just moments to prepare. I love that I can make it the night before so it’s ready for me to grab from the fridge in the morning, before my day begins.

My darling Kate Spade mug full of my decaf green tea is also setting the tone.

Morning fave.

Chia Banana Pudding | Posh Little Designs

Coconut Milk Chia Pudding (V)

Ingredients/Supplies

1 fancy glass (not required)

1/4 cup Chia Seed

3/4 Cups original Coconut Milk (you can also use almond, cashew, or any other alternative)

Half a banana sliced,

A pinch of cinnamon

Raw pecans and coconut flakes

Instructions:

Soak chia seed in coconut milk overnight or for at least 1 hour so it has time to expand.

When ready to eat, pull from fridge and top with sliced bananas, cinnamon, pecans and coconut. If the chia has soaked up most of the milk, just add more!

Enjoy!

This breakfast is enough to keep me full for the entire morning and is a great post workout meal option.

Consuming Chia seed can assist with weight loss, hydration  and blood pressure reduction. It’s also packed with omega-3 to protect against inflammation. I can’t think of a better way to start my morning!

Do you have a favorite Chia Pudding recipe? If so I’d love to hear it and try it!

Photo via Instagram. Follow me there for in-between post updates.

Have a lovely weekend all!

xo

This specific recipe for Coconut Milk Chia Pudding was seen first on Posh Little Designs. All Rights Reserved. 2011-2015.

All Images are photographed and owned property of Posh Little Designs. All Rights Reserved 2015.

Three

My youngest daughter’s 3rd birthday is coming up in just a few weeks and I can’t (or maybe it’s that I just don’t want to) believe it. I feel like I’m in some form of mommy denial about this whole year turning older thing. Maybe it’s because three represents so many new milestones like preschool and dance class. Of course I am so looking forward to seeing her shine and build her independence through new activities, but it’s the letting go part that I’m just not ready for.  But since I can’t freeze time, I’m grateful that I can capture moments of my girls through photography.

I photograph them each year around their birthday for to prep for their party and create invitations.

Below are a few of my favorite shots from our Frozen photoshoot and a reveal of the invites for her upcoming celebration.

Frozen Flat Lay | Posh Little Designs

An Anna (her favorite character from the movie) inspired look for her Frozen birthday shoot was a must.

What she wore – Anna Dress: Angora Boutique Sandals: Old Navy Necklace: Target Tiara: Mommy

One of my favorites. Baby girl your smile is infectious!

Frozen | Posh Little Designs

Her cute buddy Olaf. The perfect little prop.

Frozen | Posh Little Designs

And many sweet captures to create one Frozen storyboard.
Frozen | Posh Little Designs

Here’s a web version of  her Frozen invitations which I created using photoshop.

Frozen Invitations | Posh Little Designs

I centered her invites around one of my fave shots from our photo session and took advantage of free snowflake and #3 clip art from the great kids birthday parties website. There is no downloadable font to create ‘frozen’ looking words, but I learned that Trajan Pro is the closest matching font, which is what I ended up using throughout. I arranged the snowflakes in a variety of sizes on a white backdrop to create the final design. They were printed on 4×6 photo cards with blue coordinating envelopes and a sparkling snowflake seal.

The design of her party will follow the same aesthetic, with a color scheme of white, silver and icy blue. I’m excited to share more of the design process with you as it starts to come together!

Thanks for reading friends and happy almost Friday to you!

xo

This specific Frozen invitation design is hand created and specific to Posh Little Designs, seen first on Posh Little Designs. All Rights Reserved. 2011-2015.

All Images are photographed and owned property of Posh Little Designs. All Rights Reserved 2015.

Posh Fruit Smoothie Bowls (V)

Smoothie bowls seem to be all the rage right now, and I completely understand why. The idea of blended fruits topped with nuts and seeds, and enjoyed with a spoon, is basically perfection! If you’ve tasted one I’m sure you understand, and if not, the eye candy you’ve most likely seen on instagram is enough confirmation of all the perfection that they are. (hashtag) #smoothiebowl. A fresh and trendy way to reinvent your basic fruit blend and elevate it to a whole new level, that not only looks gorgeous with the intricate arrangements of toppings, but offers plenty of health benefits as well!

Kind of my new obsession, served in a stemless martini glass and garnished with edible blooms for the posh factor.

Posh Smoothie Bowls | Posh Little Designs

Posh Fruit Smoothie Bowls (V)

a blend of strawberries, mangos, spinach and almond milk, topped with raw almonds, coconut flakes, chia seeds and blackberries. Packed with vitamins and antioxidants and naturally vegan, dairy and gluten-free. (makes 2)

Ingredients/Supplies.

Smoothie

3 cups frozen organic strawberries

1 cup frozen organic mango

1 cup fresh spinach leaves

1 cup almond milk

Posh Smoothie Bowls | Posh Little Designs

Toppings

16-20 organic blackberries halved

2 tablespoons raw almonds

2 tablespoons of chia seed

2 tablespoons raw unsweetened coconut flakes

edible flowers (find them in the herb section of your grocery store) for garnish

Posh Smoothie Bowls | Posh Little Designs

Posh Smoothie Bowls | Posh Little Designs

Blender or magic bullet

Two clear bowls or glasses for serving. I used stemless martini glasses for a touch of chic.

Posh Smoothie Bowls | Posh Little Designs

Instructions.

Place smoothie ingredients into your blender on high until completely blended. You’ll want your smoothie to be thick since you’ll be eating it with a spoon.

Evenly divide smoothie between each glass or bowl.

Posh Smoothie Bowls | Posh Little Designs

Place toppings on your smoothies in a row style design.

First add the blackberries (they’re a little heavy so be gentle,) then a row of almonds, followed by a row of chia seeds (use a small spoon to make your row of chia otherwise they’ll go everywhere) lastly a row of raw coconut.

Place your finished smoothie bowls in the fridge until ready to serve.

Posh Smoothie Bowls | Posh Little Designs

They’re a great make-ahead breakfast or post workout meal option. I personally love to have one when I finish a Pilates session.

Posh Smoothie Bowls | Posh Little Designs

Also a chic addition to any party menu. If you’re hosting a brunch, bridal or baby shower, these would be as said above, perfection.

I hope you enjoy this recipe just much as I do!

Happy almost Friday!

xo

This specific recipe for Posh Fruit Smoothie Bowl was seen first on Posh Little Designs. All Rights Reserved. 2011-2015.

All Images are photographed and owned property of Posh Little Designs. All Rights Reserved 2015.

Inspiration Frozen

April is here and I’m back to doing one of the things that I love the most, planning celebrations! But not just any celebration…this party in particular is very near and dear to my heart, as I’m creating it for my sweet baby girl who’s turning 3 next month. Like most other girls her age, I’m sure it comes as no surprise to any of you that she chose a party theme of Frozen and she’s totally set in her ways. I’m thinking it was pretty much a done deal from the moment she heard the song “Let it Go” which I’m sure at this point I’m not the only wishing it would magically disappear from youtube. I’m actually kind of surprised at how many renditions of that single song they have, but that being said and considering that frozen is most likely the trendiest birthday party for children at the moment, I’m totally inspired but in a different kind of way! Of course I’ll be pulling together an all frozen everything party for my doll, but definitely not your typical frozen celebration. I’m looking forward to putting my posh twist on it for a Winter in Spring celebration that will not be forgotten.

Frozen Party Inspo by Posh Little Designs

1.2.3.4.5.6.7.8.9.10.11.12.13.

Because white is such a blank canvas and a very frozen friendly color, I’ll be using plenty of it for my backdrop, with a variety of soft blues and silvers to accent. Decor will include everything from jumbo balloons and tassel garland to a variety cake stands, fresh blooms, pretty paper straws and sweet treats in coordinating colors and with special character details. And we can’t forget about dessert! Plans for the menu include French macarons, cupcakes and sugar cookies, because it just wouldn’t be a party without them!

I’m nearly finished creating my daughter’s invites and will be sharing them here soon, in addition to the rest of the details from her 3rd Birthday plans as they come together!

Happy Friday to all of you!

xo

All Inspiration Boards are created and displayed in a special format unique to Posh Little Designs, 2015.

Macaron Painted Easter Eggs – DIY

I’m sure by now everyone is aware of how much I love macarons. Well after a weekend of DIY’s I think it’s safe to say my obsession with them is at a whole new level. Now not only do I want to eat all the macarons, but I want to paint them on all the things too. Like Easter eggs! Fitting considering that we’re less than a week away from the holiday and I just happened to have an excess of Martha Stewart acrylic paints on hand. No expert skills necessary. If you love macs as much as I do, and you know the basic anatomy of these darling delights (shell, feet, filling, feet, shell), painting them will be a breeze when you follow the simple steps below.

Macaron Painted Easter Eggs | Posh Little Designs

Macaron Painted Easter Eggs | Posh Little Designs

Macaron Painted Easter Eggs – DIY

Macaron Painted Easter Eggs | Posh Little Designs

Easter eggs painted in shades of pastels to resemble the much adored french cookie.

Supplies

Acrylic Paints in spring macaron shades. I chose mint, lavender, pink, yellow and white (for filling and dimension)

5- 6 hard boiled eggs

1 piece of thick cardstock

1 pencil

1 fine tipped paint brush and 1 3/4 inch wide flat paint brush

scissors

palette

iridescent glitter (optional)

Macaron Painted Easter Eggs | Posh Little Designs

Macaron Painted Easter Eggs | Posh Little Designs

Macaron Painted Easter Eggs | Posh Little Designs

Instructions

  1. The first thing you’ll want to do is draw your french macaron to turn it into a stencil. It should be about 1 3/4 inches in size in order to fit the center of each boiled egg.
  2. Based on the anatomy of the macaron, and with a pencil you’ll first want to draw your top shell in a long thin tube shape.
  3. Beneath the shell, draw your first set of ruffles (aka feet which I’ve discovered are much easier to achieve painting than baking.)
  4. Followed by another tube shape in the for filling.
  5. Beneath the filling you’ll draw your second set of ruffles (feet.) Make sure the second set of ruffles point towards the bottom of the filling and not the top part of bottom shell (2nd set of feet should be facing upwards)
  6. Lastly complete your macaron by drawing the bottom half of the shell.
  7. You can click on the photo below to zoom in.

Macaron Painted Easter Eggs | Posh Little Designs

Cut out your pencil drawn french macaron and place it in the center of your boiled egg.

Macaron Painted Easter Eggs | Posh Little Designs

With a pencil, trace the outline of the macaron onto the egg, drawing in the lines of the shells, feet, and filling afterwards.

Repeat these steps until you have one macaron drawn on the front of all 5-6 of your boiled eggs.

Macaron Painted Easter Eggs | Posh Little Designs

Be sure to allow your eggs time to rest if they’ve been in the fridge. If they have moisture on them, the paint won’t stick. Pat your eggs dry with a paper towel before you begin painting.

  1. Now for the paint. I would recommend using 2 different colors for each macaron.
  2. Purple and light purple and/or white as I did here.
  3. You’ll want to paint in your shells first, outlining the shells of the pencil drawn on macaron with your fine tip paint brush in the darkest color you’ve chosen.
  4. Then paint your shells. Mix in a little white with your darkest color for dimension.
  5. Using your lightest color, and horizontal strokes paint in the filling (center of the macaron.
  6. So far you should have the shells and filling painted as seen below.
  7. Sprinkle on a little glitter before the paint dries for a touch of sparkle.
  8. Now you can add your feet. Dip your wide flat brush into your darkest shade of paint on an angle.
  9. Dab the paint onto the egg in a tapping almost sponging motion to resemble the look of the feet.
  10. Macaron Painted Easter Eggs | Posh Little Designs

Then set aside to dry.

Repeat these steps to paint each of your macaron easter eggs.

You can experiment with colors and combos to create the macarons of your dreams.

Once your macaron easter eggs are painted, place them in the fridge to dry.

Macaron Painted Easter Eggs | Posh Little Designs

Once dry, arrange them in your favorite dishes for a very sweet display.

They make  beautiful Easter centerpieces and add a chic touch to Easter baskets for loved ones! I hope these macarons eggs inspired you to make your own. Pick your favorite flavors and paint away.

Macaron Painted Easter Eggs | Posh Little Designs

I’ll have more on the way soon! Thanks as always for reading friends!

xo

This specific DIY for Macaron Painted Easter Eggs was seen first on Posh Little Designs. All Rights Reserved. 2011-2015.

All Images are photographed and owned property of Posh Little Designs. All Rights Reserved 2015.

Rhubarb Délice Mimosas

This past Sunday I spent the afternoon catching up with my dear sis and mom. These are visits that don’t seem to happen often enough, but that I always look forward to. We all share a love for sparkling wine and champagne, so of course our time together involved bubbly cocktails, plenty of laughs and a few quick appetizers that I whipped up that morning.

Rhubarb Délice Mimosas | Posh Little Designs

I kept the menu simple with fresh fruit, assorted crackers and chips, spiced lentil and apricot hummus, pico de gallo, a variety of nuts, olives and crudité, all of  which paired beautifully with our beverage of choice for the day, Délice Chandon. A new cuvée from Napa that’s super refreshing and perfect for Spring, with fruity notes and a light sweetness. Delicious on its own, but also a rather tasty compliment to the homemade rhubarb fruit puree that I made.

Rhubarb Délice Mimosas | Posh Little Designs

The tartness of the rhubarb blends with the sweetness of the Délice bubbly so very well creating a harmonious Spring time cocktail, that’s a fabulous brunch, afternoons with your favorite girls, or as celebratory beverage option.

It was so good that I’m looking forward to many weekends ahead with this cocktail on repeat.

Be sure to add it to your Spring and Summer beverage rotation as well!

Rhubarb Délice Mimosas

A sparkling cocktail made with Délice cuvée and fresh blended rhubarb. An instant Spring and Summertime favorite.

Ingredients/Supplies:

1 bottle of Délice Chandon (will make 6 servings)

2 cups fresh rhubarb washed and chopped into chunks

2 tablespoons of raw sugar

1.5 cups of water

mint sprigs for garnish

Blender/Magic Bullet

Rhubarb Délice Mimosas | Posh Little Designs

Rhubarb Délice Mimosas | Posh Little Designs

Instructions

Place your chopped rhubarb into a pot with raw sugar and stir well to incorporate.

Rhubarb Délice Mimosas | Posh Little Designs

Add the water to the pot and bring to a boil stirring the mixture occasionally.

Continue to cook the fruit mixture until the rhubarb breaks down. About 10-12 minutes.

Transfer rhubarb mixture to your blender or magic bullet and puree until completely smooth.

Pour through a fine sieve and transfer to a glass jar.

Chill your gorgeous pink blended rhubarb until ready to serve.

Rhubarb Délice Mimosas | Posh Little Designs

Pour Délice bubbly into each of your champagne glasses filling 3/4 of the way full.

Rhubarb Délice Mimosas | Posh Little Designs

Top with two to 3 teaspoons of rhubarb mixture and stir in with a stir stick, until fully blended and a soft shade of pink.

Rhubarb Délice Mimosas | Posh Little Designs

Garnish with mint leaves and propose a toast!

Rhubarb Délice Mimosas | Posh Little Designs

Sweet, chic and délice.

Of course you can always enjoy this sparkling wine right out of the bottle. With flavors of nectarine, pear and grapefruit you’ll love it on its own or garnished with fresh citrus or herbs.

Cheers and happy Tuesday! Hoping your Sunday was as lovely as mine.

More on the way soon!

xo

This specific recipe for Rhubarb Délice Mimosas was seen first on Posh Little Designs. All Rights Reserved. 2011-2015.

All Images are photographed and owned property of Posh Little Designs. All Rights Reserved 2015.