Frozen Party – Sneak Peek

Happy Friday!! Hope you all had a lovely week and fabulous Mother’s Day as well! My dear sis has been in town from LA so we spent last weekend catching up and also celebrating my baby girl’s frozen themed birthday! I have yet to edit the final photos, but wanted to share with you a few of the party deets in a series that I captured via instagram.

Frozen Birthday Instagram | @poshlittledesigns

Her party included many signature designs and handmade details. From the homemade french macarons filled with white chocolate and a fresh blueberry jam, to the all white dessert table with icy blue accents. The sweet mini cake for our birthday babe and the white and silver tissue pom and snowflake decor, it was quite possibly the coolest frozen party around!

Can’t wait to post the final reveal here soon, but in the mean time, you can find me insta.

Have a fab weekend!

xo

All Images are photographed and owned property of Posh Little Designs. All Rights Reserved 2015.

Minnie Invites

I took another unintentional break from blogging, but it was again much-needed. In addition to attempting to plan my daughter’s 2nd birthday, and just life in general, my big brother was married last weekend and I had family in town and my sister staying with me for a full week. I see her so little that I decided to put things on hold to spend some necessary quality time with her and the rest of my family over Easter. It couldn’t have been better.

Now that I’m back at it, I’ve got just two weeks to get my daughter’s 2nd birthday prepared…I’m keeping things quite a bit more low-key this go around and feeling really good that I’ve gotten the most important part out of the way, the invitations, which I made in photoshop, using one of my favorite B&W  images from my daughter’s 2nd birthday shoot. I used the fitting walt disney print in 3 shades of pink for the ombre effect and added minnie’s bow, for the “bowtique” feel her celebration will have.

Of course I changed the verbiage a little bit to share the online sample, but this gives you a feel for the design. Another image from my instagram displays the pink envelopes and pearl embellishments that finished off each of the invitations.

Minnie Sample Invite | Posh Little Designs

Minnie Invite - IG | Posh Little Designs

Of course you can always follow me on IG for updates even when I’m unable to post on the blog @poshlittledesigns, or click on the IG icon in the right hand column.

I’ll have much more relating to my daughter’s 2nd birthday including some of the images from her birthday photoshoot to share with you soon. Thanks as always for reading and visiting even during the quiet moments here on Posh. I appreciate you all!

xo

This specific Minnie Mouse invitation design was seen first on Posh Little Designs. All Rights Reserved. 2011-2014.

All Images are photographed and owned property of Posh Little Designs. All Rights Reserved 2014.

Ombre Minnie Mouse

As we enter Spring, I ask myself where has the time gone? Although I’m thrilled for the new season’s arrival, I find my self wishing there were not only more hours in the day, but that my girls would stop growing so fast…(sigh) It feels like just yesterday that we brought our youngest home from the hospital and I can’t believe she’ll actually be turning 2 in less than two months. Eeek! That means a very special party for a very sweet and always smiling 22 month old will be taking place soon, and so surprise what theme she chose! She’s all the sudden grown very fond of minnie mouse, which is actually funny because when my oldest turned two, she wanted a minnie mouse party as well! So…..Minnie Mouse it is! But, not your typical Minnie Mouse party. I’ll be adding some unique touches to make this one extra sweet and chic! And now that the clock is ticking, no time like the present to begin the planning process, starting of course with some posh inspiration to get the ball rolling.

Here’s what’s inspiring me right now. It’s all about the ombre!!

Ombre Minnie Mouse | Posh Little Designs

Shades of pink, with many hints of minnie mouse throughout. From colored balloons to baking cups, to sweet treats and floral arrangements all within the color story. Keeping the hues super light and airy this time around. I don’t plan to use a lot of black like a typical minnie mouse party, but there’s nothing typical about my almost 2 year old, so this will suit her perfectly!

Sources 1 2 3 4 5 6 7 8 9 10 11 12

I’ll be sharing many of the DIY projects and details I create for her Ombre Minnie Mouse party over the next several weeks. Now onto the invitations, party decor and menu planning. I’ll have much more to post soon.

On another note, temps actually made it to the 60s today! Can’t wait to get some work done in my garden and begin spending more time outdoors in the sunshine! Happy Spring!! How have you spent your first few days of the new season?

xo

All Inspiration Boards are created and displayed in a special format unique to Posh Little Designs.

All Rights Reserved 2011-2014 ©

Create: Halloween Cocktail Trim – DIY

Having a beverage and cocktail station at a get together is the perfect way to make your guests feel at ease. When I’m hosting a party, I find that this is the first place people migrate to, or the first thing I mention as they enter my home.  I always make sure to have a mix of non-alcoholic and alcoholic options to accommodate everyone attending.

People love to have options, so in addition to the beverages, I like to display fun garnishes for each drink that’s available. I’ll usually match the garnishes to the theme of the gathering and make them readily available for guests to pick and choose, and add to a drink of their choice.

With Halloween just a few days away, I’ve put together a few simple garnishes for festive cocktails! If  you’re hosting a party, you’ll appreciate my affordable suggestions that literally take just seconds to put out! Your guests will love them and so will you, as most of the items seen here require little to no fuss and can be found in the candy section of your local grocery store!

Accessorize your beverages with style!

Halloween Cocktail Garnishes by PLD

To put out this festive cocktail trim for your party guests, here’s what you’ll need:

Supply List:

1 Bag Candy corn/Pumpkin Autumn Mix

Wood Skewers (trim down to 6 inches using scissors)

White Rock Candy (you could also use black or orange)

Black or white ribbon for rock candy garnish (optional)

Black Raspberry Gumdrops

Black sanding sugar

1 lemon cut into wedges

Black and White Paper Straws (find them in my Etsy shop)

Halloween Cocktail Garnishes

Instructions

Candy Corn Skewers: Gently puncture the bottom of single candy corn and candy pumpkins being sure not to push too hard. The candy is quite delicate so only twist the skewer lightly until sturdy. Make as many as needed and display.

Ribbon trim Rock Candy: Cut ribbon into 4 inch pieces and tie to the wood on each piece of rock candy.

Be sure to put out sanding sugar and cut up lemon wedges, as an optional choice.

Remaining items (gumdrops, and paper straws) require no alterations. Simply put out on display and allow your guests to add them to the drinks of their choice! I used shot glasses to display each item.

Halloween Cocktail Garnishes

My favorite garnish is the rock candy or the gum drops in a glass of sparkling wine! They add a touch of whimsy and sweetness too!

Halloween Cocktail Garnishes

Halloween Cocktail Garnishes

My birthday falls exactly one week after Halloween. I don’t have exact plans for my celebration as of yet, but I’m glad it falls on a Thursday so I can celebration the entire weekend! More on that soon.

Cheers and Happy Halloween!
xo

All Images are photographed and owned property of Posh Little Designs. All Rights Reserved 2013.

Make: Spiked Candied Apples (V)

Lately I’ve had Fall parties on the brain and I’m itching to throw a celebration in this theme. If and when I do, I’ll certainly be making some fall themed treats featuring some of my favorite items of the season. Speaking of favorite seasonal items, one of mine is the apple. My mother in law just happens to have 3 apple trees at her house so recently, the girls, my hubby and I took a trip out to her place to stock up. We ended up with enough to make a double batch of crisp, and still had plenty leftover to spare.

Apples

As you can see the apples are fairly small (4-5 inches in size). I’m not quite sure of their name, but their crisp and tartness makes them perfect for baking and ideal for bite-sized desserts. Many ideas for the leftover apples came to mind, but I settled on a treat that would test out my candy making skills. The treat that I’m speaking of, is the candied apple, but this time I’ve added a grown up twist!

Spiked Candied Apples by PLD

The twist is in the form of spiced rum, because I love the way apples and rum pair together. If you have a gathering to attend this fall, try making these! Their size makes them easy for party guests to enjoy, and they can be easily dressed up in a way that will fit the color scheme of your celebration. I tried this concept out with paper straws (visit my Etsy shop to see all the colors available) and a little bit of bakers twine for the posh factor.

Cocktail or Halloween Party anyone?!

Spiked Candied Apples (V)

The spiced rum candied sugar shell adds an unexpected kick to this fall party favorite and pairs perfectly with the tartness of the homegrown apples. There is also no dairy or soy ingredients in this recipe so it’s also vegan friendly.

Ingredients/Supplies

1 sheet parchment paper

Candy thermometer

striped paper straws, popsicle sticks, sucker sticks, or skewers (12)

12 very small tart apples

2 cups raw turbinado sugar

1 cup corn syrup

1/4 cup spiced rum

1/4 cup boiling water

4/5 drops red food coloring

Red sugar sprinkles (optional)

Spiked candied apples - supplies

Instructions

Wash and pat dry apples.

Line baking sheet with parchment paper and set aside.

Begin the process of coring the apples. If you’ll be using the paper straws, gently remove the apple stem and twist the straw into the center of the apple (at the stem) applying pressure until the straw is firmly in place. You can then cut the straw in half and use it to core your next apple. Repeat these steps until all apples are cored.

If you’re using another device to core your apples, just repeat the same steps as above. Set apples aside.

In a pot, combine sugar, corn syrup, spiced rum and boiling water.

Mix ingredients together and bring to a boil, stirring occasionally.

Be sure not to leave your sugar mixture unattended for long as it can easily burn. It should be watched with a close eye. Once it reaches the temperature of 250 degrees, turn it down to low temperature heat and add food coloring. Stir to blend.

Spiked Candied Apples

Once the color is blended, your apples are ready for dipping! Tilt the pot on an angle and begin dipping each apple until it’s fully submerged in an even layer of the spiked candy.

Gently turn the dipped apple to remove any excess coating, dip in sugar crystals and place on parchment paper.

Repeat these steps for each apple, then set aside to harden.

They will harden quickly, but be sure they’ve cooled before serving.

They can be stored in the fridge, to chill quicker, but should be eaten within 24 hours.

Display on a decorative tray or dessert table and they’re ready to enjoy.

Candied Apple Recipe Source: About.com

Spiked Candied Apples

Cheers to Fall!!

posh little tip ~ Would you like to serve these for your child’s party instead? Simply omit the alcohol, and use a full 1/2 cup of boiling water for a fun kid friendly treat!

What’s your favorite fall fruit or recipe to make?

Looking for more fall party treats to try? Check out the mini apple crisp I made last season.

Looking forward to hearing from you!

Thanks for reading.

xo

This concept is a Posh Little Designs original with the exception of the candy apple recipe as referenced above. All images are photographed and owned property of Posh Little Designs. All Rights Reserved 2013

Celebrate – Strawberry Shortcake 4th Birthday

A few weeks ago we celebrated our daughter’s 4th birthday! Strawberry Shortcake was the theme of choice this year and I had a fabulous time pulling all the details together. What a perfect celebration it was! My family traveled from near and far and great friends joined us for good laughs, delicious food and a very special surprise for the birthday girl! Let’s just say the party was berry berry sweet!

Here’s a look at the invitation that we sent to all of our guests! This is what set the tone for the celebration’s decor and party details. I made it using Photoshop along with all of the other labels, prints, banners, and decorative designs.

Strawberry Shortcake inspired invites by PLD

Welcome sign for all of our guests.

Strawberry Shortcake 4th Birthday - Posh Little Designs

Party decor. Tissue poms and strawberry shortcake balloons. A children’s celebration is not complete without details like these. Simple and affordable.

Strawberry Shortcake 4th Birthday - Posh Little Designs

I thought it would be an adorable idea to create a miniature berry stand out of gummy candy, for all of our guests to enjoy. I knew I needed a stand, but was not sure where to find one. I lucked out when I discovered that Ikea was carrying the sweetest cardboard lemonade play sets. It couldn’t have been more perfect, color scheme and all! And it only cost $12.99. The addition of handmade prints, scoops, wood boxes and assorted fruit gummies helped tie the entire concept together.

Candy Berry Stand - Posh Little Designs

Strawberry Shortcake 4th Birthday - Posh Little Designs

Gummy candy berry stand - Strawbwerry Shortcake 4th Birthday PLD

Here’s a look at the party favor and accessory display. The addition of strawberry shortcake sunnies was so necessary!

Strawberry Shortcake - Accessories and Favors

A closer look at the labels, bunting and banners I created for the celebration. I used many doily and lace style patterns to tie in the overall picnic chic strawberry theme.

Strawberry Shortcake Prints, Labels & Banners - Posh Little Designs

The party favors were made using fruit berry baskets. Each basket included a photographed image of either Strawberry Shortcake (for the girls) or Huckleberry Pie (for the boys), along with rings, sunglasses, bracelets and more.

Berry Basket Party Favors - Posh Little Designs

I used a  mix of roses, carnations, daisies and mums to create the floral arrangements. Each  was placed in a mix and match mason jar and decorated with paper label tags that were attached to wood skewers.

Centerpiece - Strawberry Shortcake

Mason Jar centerpiece - strawberry shortcake

The birthday beauty!

Birthday beauty!

Guests, friends, cousins – major party cuteness!

Party fun - Strawberry shortcake

My youngest daughter and my good friend’s son. Only a few months apart. So precious and they had such a great time!

Little guests and friends

I went with an all white color scheme for the dessert table and tied in reds and pinks though the flowers, treats and prints. The lace, milk glass, mason jars, mix and match stacked cake stands which displayed the homemade mini strawberry shortcake were fitting. Additional details included washi tape wrapped wood cutlery and cute gingham napkins in pink from Ikea.

Strawberry Shortcake - Dessert Table

Dessert Table details - Strawberry Shortcake

The sugar cookies were made dairy free, using the cutters available in my Etsy Shop and this recipe (without the liquor)My lovely sisters and good friend helped decorate them!

Strawberry Shortcake sugar cookies

I used my favorite paper baking cups to hold the miniature strawberry shortcakes, made with vegan biscuits. I’ll have the recipe available on the blog very soon.

Homemade mini strawberry shortcake

Candy - Strawberry Shortcake

The kids enjoyed playing our “pin the strawberry” game!

Birthday games - Pin the strawberry

All of the food was made homemade by me and my mom. Our menu was picnic style with plenty of salads, my mom’s amazing fried chicken, assorted appetizers, veggies, fruits, breads, bbq and more. We served pb&j triangles and organic strawberry applesauce from trader joes to the kids.

Berry Cafe menu

Beverages included a homemade Sparkling Strawberry Punch with garnishes + mint and strawberry infused waters, sparkling water and spirits.

We added character prints to the paper straws as seen in the photo below. The paper straws are available in my Etsy Shop!

Infused waters and Strawberry Punch

I wrapped the tops of the wood cutlery in pretty washi tape for a decorative touch and placed them in twine wrapped mason jars for display.

Picnic details - Strawberry Shortcake

The glass bottles for the infused water came from Ikea. I added chalkboard signs to each to tie in our theme.

Mint and Strawberry infused water

I made the cake homemade and dairy free, using strawberry puree and a strawberry swiss meringue buttercream. It was a little dense, but still delicious! We wanted to keep it simple and rustic and felt like it turned out perfect!. The bunting was made in Photoshop and I used paper straws currently available in my Etsy Shop to tie it together.

Homemade birthday cake and bunting

Here’s the birthday girl blowing out her candles!!

Happy 4th Birthday!

After cake, our birthday girl and guests were greeted with a very special surprise!

Oh Deeery's Ice Cream Truck - Strawberry Shortcake

The most darling ice-cream truck I’ve come across, operated by the sweetest gal I’ve met! As you can see our sweet girl and all the guests truly enjoyed her visit!

Ice-cream fun!!

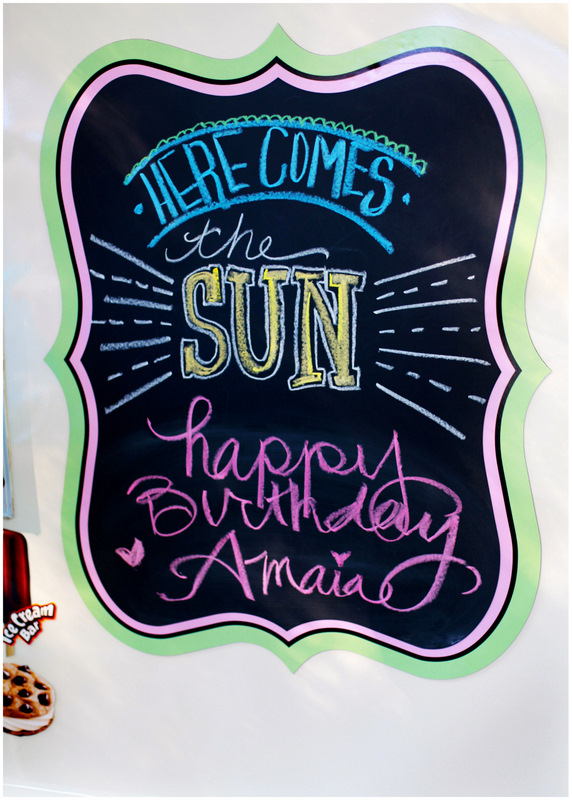
A personalized sign for our sweetheart courtesy of Ohhh Deery’s. Find her on Facebook.

Personalized sign - Ice-cream surprise

All lined up and looking adorbs…

Ice-cream surprise - Strawberry Shortcake

What a moment this was! Birthday girl + ice-cream treats. Party perfect!

Birthday girl and ice-cream

More sweet details.

Ice-cream truck fun

The perfect ending to a very special day!

Newest ice-cream truck operators

To thank all of our guest for coming, we gave away mini bags of assorted fruit candy and M&Ms, wrapped in bakers twine.

Each label read: “thank you berry much!

Thank yous and party favors - Strawberry Shortcake

Sweet memories to last a lifetime!

I hope you enjoyed seeing the images from my big girl’s 4th birthday bash! If you have any questions about how you can create a berry sweet celebration of your own, please don’t hesitate to ask. I always love hearing from you all and appreciate your comments and feedback.

Check back soon for that mini strawberry shortcake recipe. Another ideal summer party treat. Coming up soon!

xo

All photography, decor, paper designs, food, desserts and floral arrangements created by Posh Little Designs and assistants.

Images are photographed and owned property of Posh Little Designs. All Rights Reserved 2013.

Strawberry Shortcake Party sneak peek

You may be wondering what happened to the party related posts that I promised to share with you last week? Well unfortunately there were no posts because I became very ill with a flu bug and was unable to do anything party related until the day before the celebration. Talk about bad timing!! Luckily I was able to rely heavily on my hubby, mom, sisters and bestie to get everything accomplished and thankfully for them, my daughter had the best day, complete with some extra special details. I did take plenty of photos which I plan to share with you soon, but in the meantime here’s a sneak peek of her special Strawberry Shortcake 4th birthday, captured via Instagram.

Strawberry Shortcake - sneakThe cookies were decorated with the help of both my sisters and best friend, the dessert table was setup with mix and match glassware, lace and floral accents. I hand designed all bunting, labels, and banners. We got a special surprise visit from the cutest vintage style Ice cream truck! Everyone enjoyed the gummy candy berry stand, sweet party favors, lunch menu, homemade cake and more!

strawberry shortcake sneak peek

I have so much more to share with you relating to the celebration, but this will take me a little bit of time considering that I’m still under the weather and have family in town. After a visit to my dr earlier and a dose of antibiotics, I’m hoping that be fully better and back on my regular blogging schedule by next week!

Until then, I appreciate you reading and I hope you stop back by again soon.

xoxo

Strawberry Shortcake Party Essentials

Hello! Hope everyone had a great weekend! I’ve been busy getting plans in order for my daughter’s 4th birthday which is coming up in just 6 days. I can hardly believe it! The summer has surely flown. My sister will also be flying in from LA this Saturday and staying for a full week which means life is gonna be hectic here at home. Whenever things get a little crazy and I don’t have much time for fresh blog concepts, I rely on Instagram to share with all of you what I’m up to. An easy way to still feel connected throughout the chaos.

Below is a look at a few of the decorative essentials I’ve compiled for the party and posted to Instagram a few days ago. As you know, our theme is Strawberry shortcake. We’ll be combining elements for a picnic/chic themed event, like the lace and twine accents, washi tape wrapped wood cutlery, my favorite baking cups, green striped paper straws (which can be found in my Etsy Shop), and some custom strawberry shortcake labels made by yours truly.

20130729-150831.jpgI’m so excited to see how it all comes together!

I’ll be sharing more party snippets from Instagram later this week. Plus I’ll have a sweet treat from this past weekend up on the blog soon.

I hope you check back in for the recipe and to see how everything relating to the party ends up!

In the meantime, let’s be friends on Instagram.

Have a lovely week.

xo

Celebrate – S is for Strawberry

If you’ve been following my blog for a while now, I’m sure you’re aware that my daughter is getting ready to turn 4 in just a few weeks! Each year as her birthday approaches we allow her to choose a party theme and this year she chose one of her favorites, Strawberry Shortcake. I’ve already started on the planning process and have many ideas that I’ll be incorporating to make her celebration special and memorable.

When I think of strawberry shortcake, the first things that comes to mind for me is the fruit itself, and when I think of strawberries, I’m reminded of everything we love about summer in the pacific northwest. The local berry stands that line the country roads, lazy afternoons in the backyard, fresh lemonade, the farmers market and an array of delicious fresh and local products.

One of our favorite things to do during summer is to have picnics. We love to lounge in the sun and enjoy our surroundings, while also having a bite to eat. In turn this inspired me to create a picnic style strawberry shortcake party for my daughter! A less literal approach, but I still plan to tie in many strawberry shortcake character details.

From gingham to floral prints, polka-dots and doilies, a super girly celebration is sure to emerge, as sweet as the berry itself.

Strawberry party inspiration by PLD

Below is the invitation I hand created in photoshop. We just mailed them off to our lovely guests this week.

Strawberry Shortcake inspired invites by PLD

What are your thoughts on this party inspiration? Do you like the idea? If so and you’re looking to create a similar celebration of your own, I’ve provided the links below for all items shared in this post.

Sources: 1. gingham bunting 2. picnic packs 3. floral fabric 4. gingham washi 5. tissue pom 6. polkadot balloons 7. strawberry gummies 8. doilies 9. pink berry baskets 10. baking cups

strawberry watercolor illustration

Many of the items above came from my Strawberry Shortcake pinterest board. I invite you to join me there if you haven’t already. Let’s be friends!

xoxo

Make – Prosecco Infused Fruit ~ Red, White & Blue

One of the must serve beverages at a posh celebration is sparkling wine/champagne! The bubbles, fizz and pop of the cork represent everything that a party should be. And since it’s available in all price ranges it’s affordable for any type of gathering. Pour it in your best flutes or pair it with your favorite mixer and you have a party on your hands in a matter of seconds. Or if you’re up to trying something new you can pair it with some festive fruit for the Fourth of July holiday happening in just a few short days.

Prosecco infused fruit

Prosecco is the Italian and less expensive alternative to champagne. The sparkling wine is sweet to taste and usually a bit on the dry side. It’s a classic in bellinis and goes well with all sorts of fruits, which is why I chose to use it for this recipe. La Marca happens to be one of my favorite brands of prosecco. It’s good quality and well priced. I picked watermelon, pear and blueberries to tie in the colors of the Independence Day holiday. Cut the fruit into star shapes using a mini star cookie cutter and finished them with handmade ribbon toothpick flags.

Fourth of July Fabulous.

Prosecco Infused Fruit

Prosecco Infused Fruit – Red White & Blue

The Prosecco paired with the watermelon, pear and blueberry is light, refreshing and the perfect celebratory bite and palate cleanser to serve between an appetizer and main course, or as an after dinner refreshment.

Serves 12

Ingredients/Supplies

1 bottle Prosecco/Sparkling Wine

1  half of a miniature watermelon sliced into 2 inch thick rounds

2 pears sliced into 2 inch thick pieces

12 blueberries (or 1 for each guest)

Fresh lemon juice

Mini star-shaped cookie cutter (optional…you can always cut them into even squares or rounds – use what you have on hand)

12 Appetizer spoons

12 toothpicks and red ribbon.

Instructions

Slice watermelon and pear into even pieces.

Squeeze fresh lemon juice over sliced pear to prevent browning.

Using your mini star cookie cutter begin cutting the fruit rounds into star shapes.

Place all cut fruit into a medium size bowl adding the blueberries last.

Pour champagne over top the fruit until fruit is fully submerged.

Place in fridge to chill and soak for 1 to 2 hours.

Prosecco infused fruit

Meanwhile and if you’re feeling crafty, you can prep the toothpick flags.

Toothpick Ribbon Flags

Cut ribbon into 4 inch straight line pieces.

Place the toothpick to the end of each piece of ribbon and tie, double-knotting until secure.

To add the pointed edge, simply cut a small triangle from the end of each piece of ribbon.

Set toothpick flags aside until fruit is ready to skewer.

Ribbon Toothpicks - DIY

Assembly

Once your fruit is fully infused (feel free to take a taste) it’s ready to be skewered.

Skewer the center of the blueberry first, followed by 1 piece of pear and one piece of watermelon.

Make sure your toothpick is not sticking out of the bottom of the watermelon otherwise your infused stacks will not stand up straight. None of the pick should be showing from the bottom.

Place each infused fruit stack onto a single serving appetizer spoon and finish by filling with a little extra Prosecco. A nice final note after the infused fruit has been eaten.

Repeat these steps and place in the fridge until you’re ready to serve.

Prosecco Infused Fruit

Prosecco infused fruit

Prosecco Infused Fruit

Enjoy!

Posh little tip: To make these kid friendly or non alcoholic, simply serve them as skewers by soaking them in sparkling cider instead of sparkling wine.

Happy Fourth of July! I hope everyone has a safe and memorable one! Please do check back soon for more!

As always, I appreciate you reading.

xo

This concept and fruit skewer recipe is a Posh Little Designs original. Images are photographed and owned property of Posh Little Designs. All Rights Reserved 2013.